
Although it is quite popular because of its affordable price and convenient dimensions, it can be slightly complex to use as the majority of its primary functions are accessed via only two buttons. Therefore, it is crucial to understand the basics of the camera and its functions to utilize it properly.
After several hours of first-hand testing and experience with the SQ11 Mini DV, we are going to cover the following points in this guide to equipping you with 100% accurate and easy-to-understand knowledge about this camera:
- How and where the SQ11 Mini DV can be used
- Setting it up for first-time users
- Explanations of its functions
- How to record a video and capture photos
- And much more!
Before we dive into this review, you may check out our mini spy camera product guide and the mini camera instructions how to use guide!
Resolution: 1080P/30FPS
150 Degree Lens
Motion Detection Technology
Night Vision
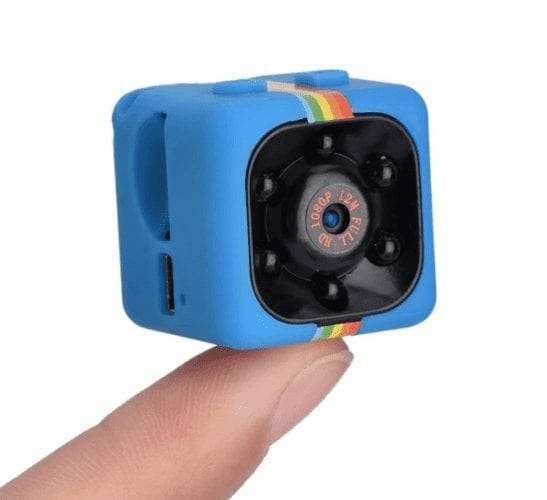
This teeny camera puts a great deal of functionality into a compact and beautifully designed cuboid. making it helpful and useful in a variety of circumstances. Its video quality is exceptional at both 720p and 1080p. It has a motion detection system and night vision, which is quite responsive. It’s little, discreet, and light-weight. The SQ11 is remarkably delicate and captures audio perfectly with its elegant microphone.

Setting Up the Camera
For first time users, a couple of steps need to be completed before the camera is set up and ready to use. The steps we’ve written below are supposed to be followed and completed in the order they are presented or otherwise you will not get the results that you desire.
Step #1: Installing an SD card
First of all, you will require an extra microSD card to save pictures and videos inside the camera. It is advised to opt for a 32 GB card to get as much storage as possible. Insert it inside the SD card slot in the camera.
When done, the camera will produce a ‘. txt’ file (TIMEREST.txt) to show the time/date information on your video/photo. To locate this file, browse the video camera’s USB drive and you will find two folders by the name of ‘PHOTO’ and ‘VIDEO’ there and the .txt file along with them.
The format of the data in the txt file is 20170726152035 N (to disable display) and 20170726152035 Y (to enable display). Note, the date entered is in the format of YYYY/MM/DD and only the first six figures refer to the date. The remaining are auto-generated and should not be touched. Open the TIMEREST file in an editor like Notepad and set the proper date and time along with ‘N’ or ‘Y’ at the end to enable or disable the date’s display in your video/photo.
Step #2: Charging the Camera
This tiny camera has an integrated lithium-ion battery which is its primary source of power. You can charge it in the following ways:
- Connect the small camera to the USB port of your PC, make sure you are not recording anything at this point.
- Connect the camera to a battery charger from a 220V network or a portable 5V battery charger. In this case, you can continue to utilize the mini-camera whilst it is charging. When being charged, the blue and red LEDs will flash continuously. After the camera’s battery has been fully charged, the blue LED will flash continuously and the red LED will shut off. (1, 2)
Important Points to Keep in Mind:
- If the battery is empty or there is an insufficient space on the SD card to continue, the blue and red LEDs on the camera will blink for 5 seconds all at once, after which it will save whatever was recorded and turn off automatically.
- If the SD card is not set up, the blue and red LEDs will blink at the same time for 5 seconds, after which the camera will immediately switch off.
- If the camera remains in the standby mode and is not in use for a long time, it will instantly shut off after 1 minute to preserve the battery.
Recording Videos
A video in the SQ11 Mini DV camera can be recorded in two different qualities, the 720p, and the 1080p. The former takes lesser space in the SD card whereas the latter produces a much better video but takes more space.
To start recording videos on this camera, follow these steps:
- Hold the ON/OFF button for 2 seconds to power the camera (If no card is placed, a blue LED will flash for a couple of seconds, after that a red LED will flash and the camera will automatically turn off. When an SD-card is installed and the camera is powered on, a strong blue LED light will show as long as the camera stays ON.
- For 720p recording, when the blue LED is flashing, press one time the ON/OFF button to start tape-recording. Once the blue LED has blinked 3 times, the recording will start. Throughout the recording, no LEDs are lit. To stop the recording, press the ON/OFF button once again. The color of the LED goes back to blue/red.
- For the 1080p recording, switch to it by pressing the ‘Mode’ button. Press one time the ‘Mode’ button and the LED will turn from blue to blue/red color. Press one more time the ON/OFF button to start recording. The LED will flash 3 times blue and red before the recording starts. Once again, no LEDs are lit while recording. To stop the recording, press the ON/OFF button once again. The color of the LED goes back to blue/red.
- To power off the camera, hold the ON/OFF button for about 6 seconds and the camera will turn off.
Last but not least, it is essential to understand that the camera will constantly record sequences of 5 minutes each regardless of whether you selected the 720p or 1080p mode. When the SD-card has no space left, the camera will immediately loop and erase the oldest file in the storage. When the battery is almost empty, the camera will save the last sequence of the recorded video and turn it off automatically.
Capturing Photos
The SQ11 is capable of taking extremely high resolution and superb quality images. To capture an image with the camera, follow these steps:
- Hold the ON/OFF button until the camera is turned ON, indicated by a solid and static blue light
- Press the ‘MODE’ button twice. This will put the camera on photography mode.
- To capture a picture, press the ON/OFF button once. A red LED light will blink to indicate success and the image will be saved.
- Photos are captured in the resolution of 4032×3024.
Night Vision
It is entirely possible to record videos at night by utilizing the night vision feature of SQ11. You can record a video in 720p as well in 1080p.
For 720p night vision recording, start the camera and stand by till the blue LED is lighting. Hold the on/off button for 2 seconds. The red LED will blink two times. You have now entered the night vision mode. Press one time the on/off button to start tape-recording. No LED will blink during recording. Press once again the ON/OFF button to end the recording.
For 1080p night vision recording, start the camera and wait up until the blue LED is lighting. Modification to 1080p by pushing one time the ‘Mode’ button. Hold the on/off button for 2 seconds. The red LED will flash two times. You have now entered the night vision mode. Press one time the ON/OFF button to start tape-recording. There will be no LED lights while recording. Press once again the on/off button to end the recording.
Motion Detection
This camera has integrated motion detection sensing units. To utilize them, follow these actions:
For 720p motion detection recording, power the camera and wait up until the blue LED is lighting. Hold the ‘Mode’ button for about 3 seconds. The blue/red LED must flash 3 times before the motion detection can become active. Throughout the recording, the LED lights will remain off. The camera will now record a sequence of at least 1 minute. Provided a motion is identified the camera will constantly tape-record (as much as 5 minutes optimum). After saving this sequence in its storage, the camera will stop recording. The LED is still off, however, the motion detection mode stays triggered. When a brand-new motion is discovered, the camera begins again to tape-record as long as a motion is identified (5 minutes sequence max). You can end the motion detection mode by pushing the ON/OFF button.
For 1080p motion detection recording, start the camera and hang around till the blue LED is beaming. Press the ‘Mode’ button once to alter to 1080p. Hold the ‘Mode’ button for about 3 seconds. Once the blue/red LED flashes 3 times, motion detection becomes active. The camera will now record a sequence of a minimum of 1 minute. So long as a motion is discovered the camera will constantly tape (as much as 5 minutes optimum). The LED will remain off, however, the motion detection mode stays active. As soon as a brand-new motion is identified, the camera begins again to record as long as a motion is found (5 minutes sequence max). Brand-new motion detection is reported by a brief blue/red blinking LED. You can end the motion detection mode by pushing the ON/OFF button.
Resetting the Camera
If you want to delete everything in the camera and reset it to its default settings, it is possible. Resetting the camera is quite simple. However, do remember that it is irreversible. So if you want to reset it, make a backup of all files and then reset.
- Switch on the camera. Wait till the blue LED is blinking
- Get something little like a needle
- Push it in the paperclip inside the tiny hole beside the mini-USB outlet
- The blinking blue LED light will go off, indicating that the reset is done
- Turn on the camera now
Using the Camera as Webcam
It is entirely possible to utilize the SQ11 as a cam, however, not all software is compatible with this camera. An ideal software application to utilize would be the Debut Video Recorder by NCH.
- Download and install the program from the main site and set it up
- Link your SQ11 to your computer system and hold up until all the drivers are installed. (it’s not important to remove the SD card) When it’s done, the LED will first blink blue light, then it will blink red.
- Push the ON/OFF button of the camera (some additional drivers may be needed but they will be automatically installed after this step).
- Open up the ‘Tools’ selection, then ‘Options’ In the Video section, picked the gadget ‘GENERAL -UVC ‘.
- You can now use the SQ11 as a webcam for your computer.
Common Applications
With a bit of creativity, the SQ11 camera can be skillfully set up for a variety of usages, making this camera one of the best in its category at such a low cost. Here are some of the most common applications:
- It can be utilized as an extemporary nanny monitoring cam to keep an eye on your kids or home visitors while you are away.
- It is likewise quite helpful as a dashcam for brief, day-time journeys or adventurous trips. Considering the high quality of videos it can record, the outcome will be a definite source of entertainment and beautiful memories.
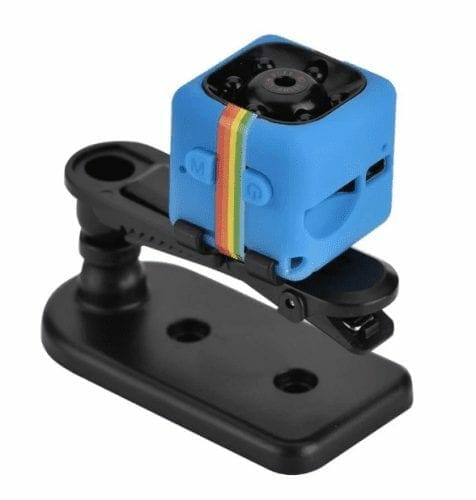
- You can also use SQ11 as a semi-discreet body camera as that’s mainly what the advertisements and promotional content show it as; a sports camera. Simply clip it to a coat pocket, handbag, or something and go on about your activities.
Conclusion
This teeny camera puts a great deal of functionality into a compact and beautifully designed cuboid. making it helpful and useful in a variety of circumstances. Its video quality is exceptional at both 720p and 1080p. It has a motion detection system and night vision, which is quite responsive. It’s little, discreet, and light-weight. The SQ11 is remarkably delicate and captures audio perfectly with its elegant microphone.
For those who are trying to find a portable, conveniently-sized, and premium quality camera at a budget-friendly cost, the SQ11 will serve as an ideal companion, both for professional and personal usage.
There is also a similar camera that we’ve reviewed in detail, the SQ8 Mini DV Camera Review. You can also check product guides such as; best spy camera and the hidden camera clock.
Resources
(1) lithium-ion battery – https://electronics.howstuffworks.com/everyday-tech/lithium-ion-battery.htm
(2) PC – https://www.webopedia.com/TERM/P/personal_computer.html
